
The Soundboard and Bridge
Stika spruce (Picea sitchensis)
From what was available in Europe, apart from the Italian use of cypress, there does seem to have been a consensus towards spruce (Picea excelsa, Picea abies) or fir (Abies alba). Not easy to tell the difference when it's no longer a tree. Slow-grown timber from high altitudes (hence with close growth-rings) was preferred, and I do not disagree with this. However, despite published claims, I cannot accept that the phase of the moon when the tree was felled is a valid factor in determining quality. Similarly, I'm all in favour of rituals involving Unicorns and Maidens of Unspotted Virtue (challenging though it may be to find these in these parts of the world, in spite of the local abundance of Unicorns). But I cannot see that they have anything to do with soundboard quality.
It is received wisdom these days that we must have close grain, and boards sawn on the quarter, but my observations from early instruments show considerable deviations form this. So what to do? I'm happy to go along with the idea that Picea or Abies species with a nice tidy grain are good, and quarter-sawing certainly helps to maintain flatness. But I can't accept that Sitka Spruce (P. sitchensis) is no good, just because Andreas Ruckers hadn't been to north-western Canada. You've probably gathered by now that Sitka Spruce is what I'm going to use. I have some beautiful boards, clear, close, straight grain, cut on the quarter, and in good widths. I will also briefly mention Western Hemlock (Tsuga heterophylla) - another species unknown to Ruckers. Freely available in wide, quarter-sawn close-grained boards. But who has the courage to make an instrument with this? There must be physical parameters relevant to these timbers which will define their suitability for soundboards - but does anybody know what they are? Or shall we stand by our ancient rituals... at least they are more fun.

Western hemlock (Tsuga heterophylla)
As I said, the subject of soundboards will always be controversial. I would welcome your comments and thoughts. Is there a special magic about old soundboards? Has anybody ever tried hemlock? I will be happy to add a selection of comments to this section. Please email me, David, on friends.sp@btinternet.com
A contribution from a Friend, who was not happy with his experience of sitka spruce because it was rather soft and woolly, and lacked a nice 'ring' when tapped. This experience does confirm that we are all aware of some physical properties, even if we are not quite sure what they are. Curiously, though, my experience is the reverse: I have some P. abies (European) that is very pale and slightly soft, whereas the sitka spruce that I am using feels taut and resonant, with a beautiful 'bong'.
Enough of this waffle, though. The soundboard is now finished, and ready to receive the bridge and bars. the first stage was to prepare sufficient boards (three, in this case) to cover the job, to a reasonable finish and an even thickness of 4 mm. The old makers (or rather their apprentices) achieved this with hand-tools, of course, but it is so very much easier and quicker with a planer/thicknesser.
Jointing of the boards is a critical step, and one which leaves no time for photography! I used proper hot glue, which means working quickly, but that is the original way, and proven to last for 300 years. Then the board was fitted to shape, aiming for a very good fit around the register - the joint that will always be visible. The joints around the other edges will be covered by mouldings.
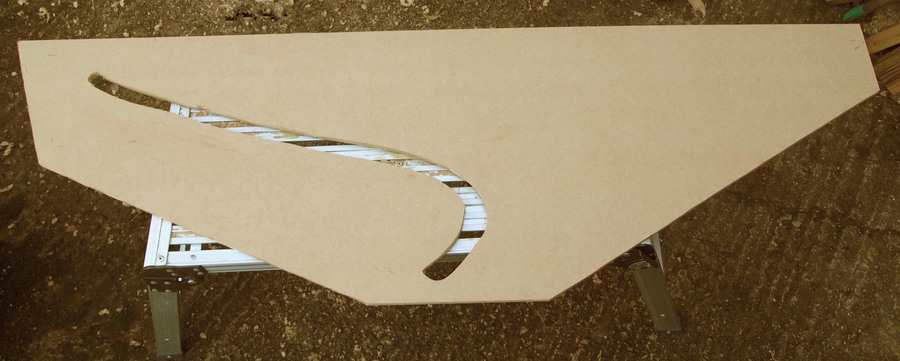
The picture above shows the jig-board, in which the cut-out mirrors the shape of the bridge. It was first employed in the restoration of the original, to support the delicate soundboard upside-down, to facilitate repair work to the many splits and other faults. The new soundboard is the same thickness as the original - just over 1 mm in places - so it is similarly delicate, and needs support to avoid damage during fixing of the bridge and bars, and for the pinning of the bridge.
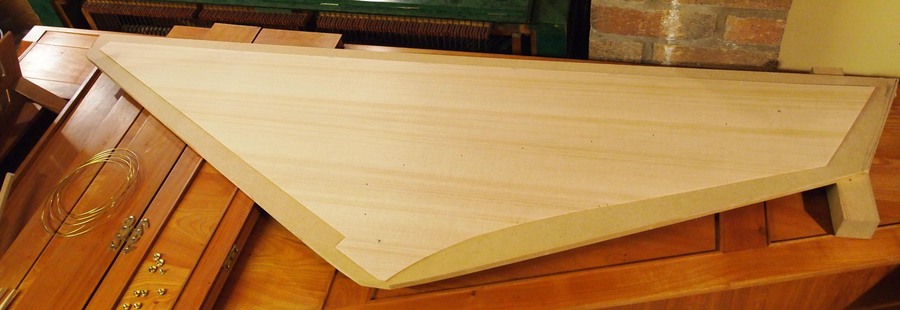
In the picture above, we see the finished soundboard. A great deal has been written about the importance of getting the thickness right, and many plans give 'contour patterns' of the originals to within 0. 1 mm. It cannot be wrong to follow this, but I would make two observations:
1) the old makers would have had no way of measuring thicknesses accurately away from the edges, and
2) no two pieces of wood are the same, and thickness is only one of the variables which affect the musical characteristics of the soundboard.
Furthermore, different instruments by the same maker exhibit variations, albeit within a theme. So did they exercise skill and judgement rather than simply following a set of rules? I would think so.
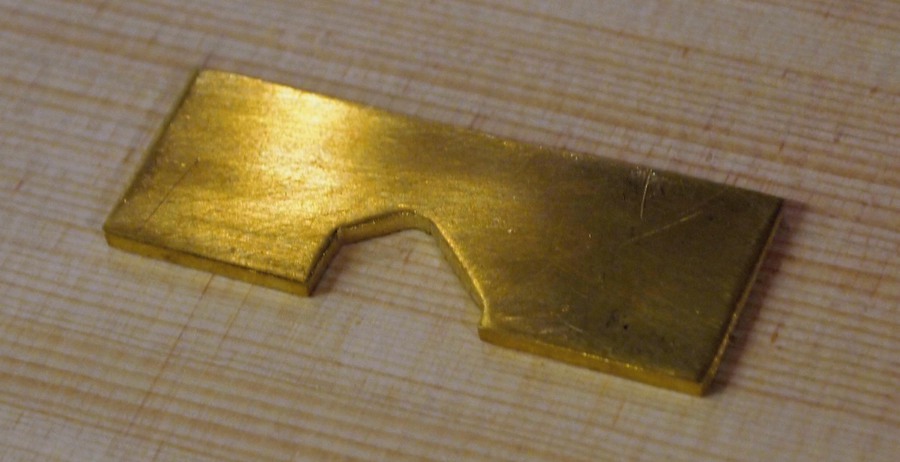
The bridge and nut are sawn from beech, and have the same section (although the height is slightly reduced at the treble). It is worth making a template to check the section. Another of those things that is even more worthwhile if you plan to make more than one!
The bridge is marked for the positions of the pins, and pilot holes drilled at this stage. This job is tricky in this copy, because the pins are angled, and mounted part-way down the sloping faces. A rubbing of the tops of the pins in the original is therefore somewhat misleading.

The bridge of the original is secured by tacks from underneath, in addition to the glue. I have modified this slightly by using screws with cup-washers. The holes in the soundboard and bridge are pre-drilled and tested, of course. Tightening the screws helps to pull the glue joint tightly together. Special long-reach clamps are also used - see picture above. This is probably the most important joint in the whole project. It needs to be done well.
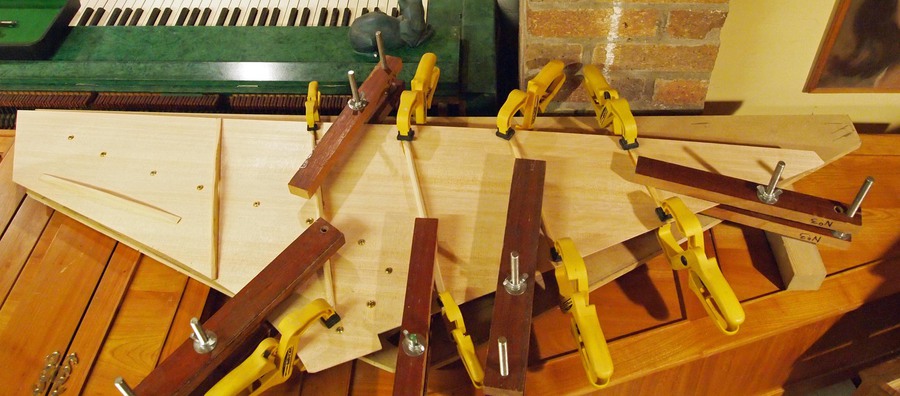
The heads of the screws are seen in the picture above, where the first four bars are being glued into place.

The bridge in place...
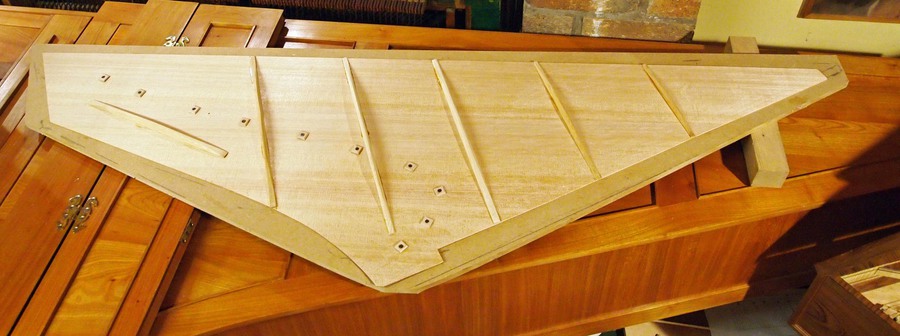
...and the bars. The modern screws with cup-washers have been replaced with traditional slotted iron screws with square wooden 'buttons'. The arrangement of the five parallel bars is fairly normal for spinets where the soundboard grain is parallel to the spine, but they normally go further towards the tail - the bass end of the bridge - at the left of this picture. The sixth bar parallel to the bridge is unusual.