
The Keyframe and Keyboard
We love keyboard instruments, and the keyboard itself is the defining part, acting as it does as the point of contact between the player and the instrument. All makers take a particular pride in this part of the job, and we strive to make it as attractive and functional as we possibly can.
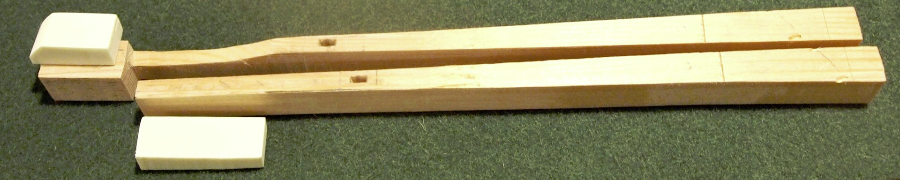
The keyfame of the spinet is a simple lap-jointed construction with a hardwood balance-rail, and softwood side-pieces and back rail. Unlike most pianos, there is no front rail, as the keys are rear-guided by a rack with vertical slots (not yet shown).
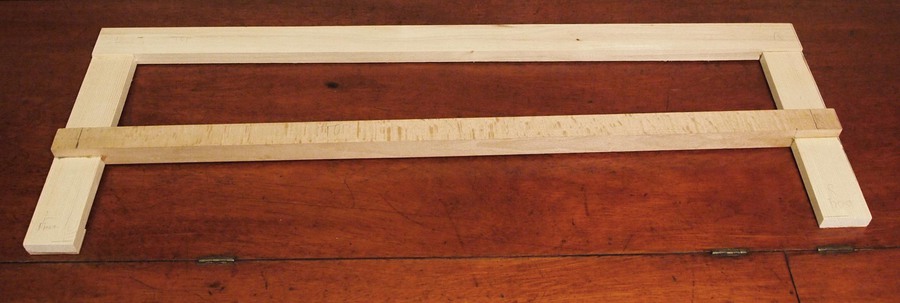
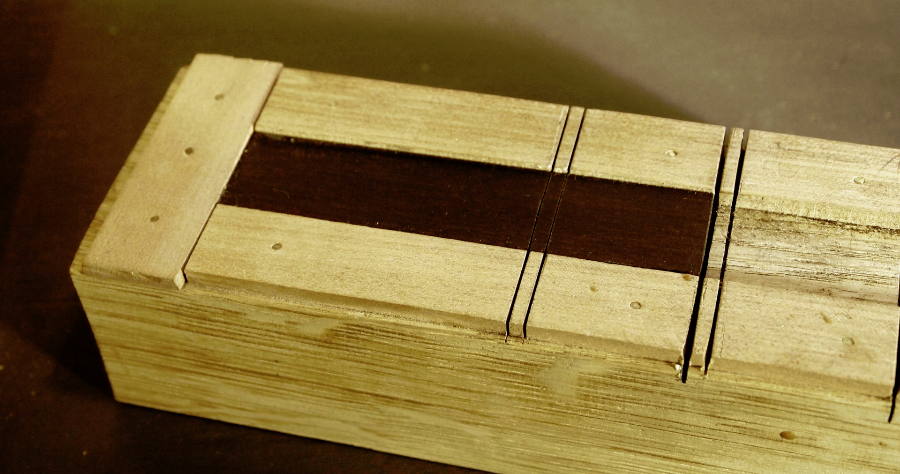
At this stage, we also make the two end-blocks, which will be fixed to the keyframe, and are a vestige of the origins of the spinet in the Italian 'inner-outer' tradition. These blocks, originally part of the actual instrument itself (the 'inner') were shaped to enable it to be partly or completely withdrawn from the shaped outer case. They do retain part of this function in our spinet, as they make it easier to withdraw the keys and keyframe if this is necessary for maintenance.
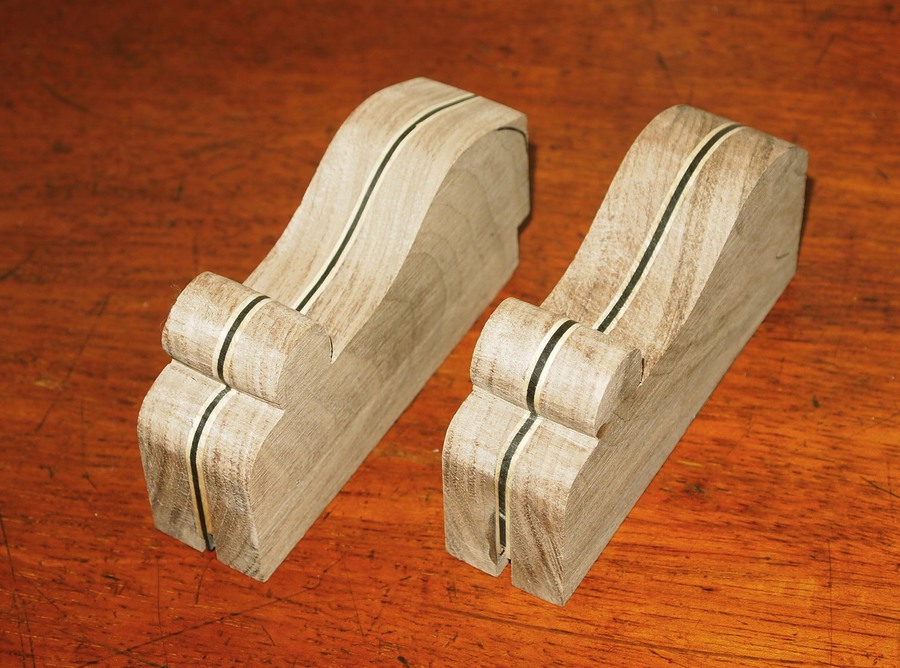
The blocks have a central core of box/ebony/box, which will match the decoration on the nameboard. It is essential that each block should be cut from a single piece of walnut, cut down the middle to receive the veneer sandwich. Otherwise, the grain will not match, and the light will be reflected differently, giving a very odd appearance.

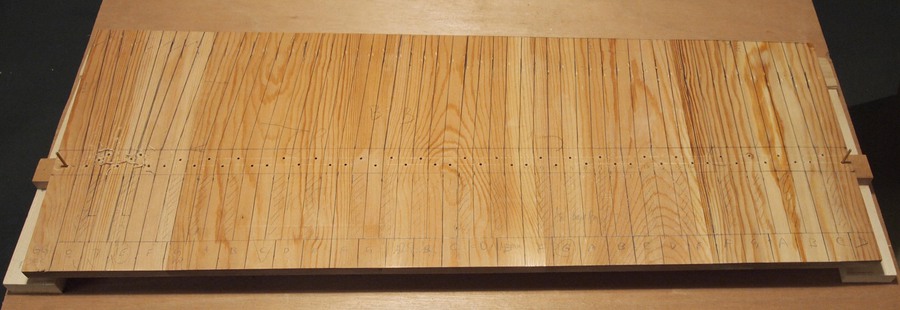
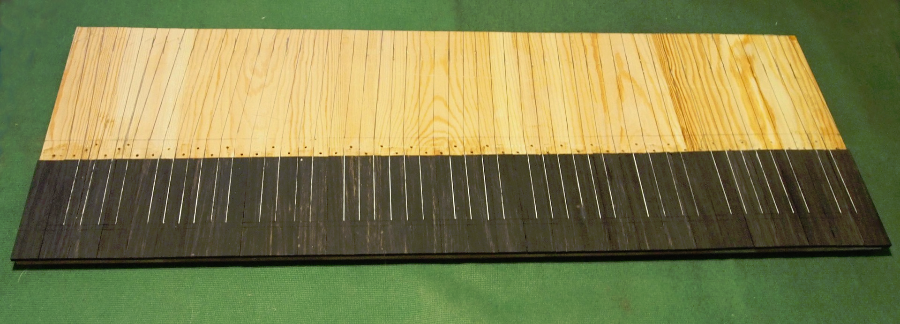
The keyboard itself is made from short pieces of wood of the correct thickness, jointed to make a panel. Whatever wood we use, it is essential that it is well-seasoned, as any instability will cause the keys to jam, and make the instrument unplayable. My personal preference for timber is lime, which is easy to work, light in weight, and dull in resonance, so that the keys do not clatter. It is also uniformly light in colour, with unobtrusive grain, so it is easy to mark. However, the keyboard of the Blunt original (and many other contemporary instruments) was made from pine, so this is what we have done here. The timber used was reclaimed from old library shelves, and well over a hundred years old. One problem with using pine is that there is a big difference in hardness between the light (summer) and dark (winter) parts of the growth rings, and this tends to cause a drill to wander into the softer part. This is not good, because accurate drilling is essential. To minimise the problem, material was chosen with relatively 'flat' grain, as seen in the picture above.
After cutting the panel to the size of the finished keyboard, we can mark it out. We quickly realise that we have to follow (or invent) some rules. We start with the front part, which will be visible in the finished instrument, and is the part that will actually be played upon. It is fairly obvious that the front parts of all the natural keys should be the same width, so we divide the total into the number of natural keys - 31 in this case. Then draw a line where the fronts of the sharps will be, and another for the back of the balance-rail. The lines between Bs and Cs, and Es and Fs, can be taken back to this second line. Now the fun starts. We usually make more rules, that C and E should be mirror-images of each other, and similarly F and B, and G and A. D will be symmetrical. And all the sharps should be the same width. Now we have a puzzle. Let's call the width of a natural one unit. In the group of keys C - E, there are five keys to fit into three units, but in the group F -B there are seven to go into four units. Unfortunately, 3 ÷ 5 is not the same as 4 ÷ 7
( 0.6 compared to about 0.57 ) This means that there is less space to share out in the F -B group. We now have a choice, and there are many theoretical options. However, the realities of the width of saw-cuts, and the limits of working accuracy, make it a bit simpler. One starting point is to accept the 0.57 unit as the width of a sharp and also the tails of the keys F - B. Then, if we make C# and D# the same 0.57 unit, we have to make the tails of the keys C,D, and E wider. Early Broadwood pianos keep C like F, and E like B, which results in a very wide tail for D. Other makers (including Blunt) spread this 'error' a bit, making the tails of C and E wider, but still leaving D the widest. You choose!
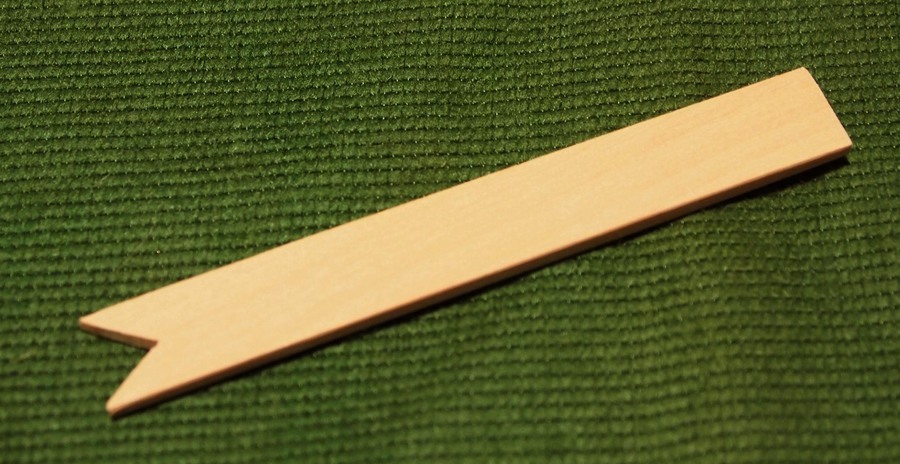
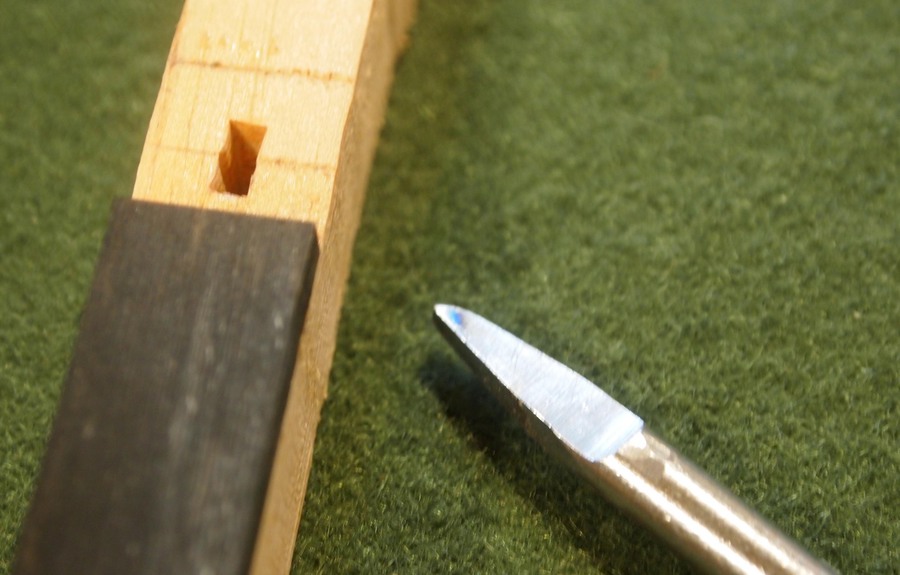
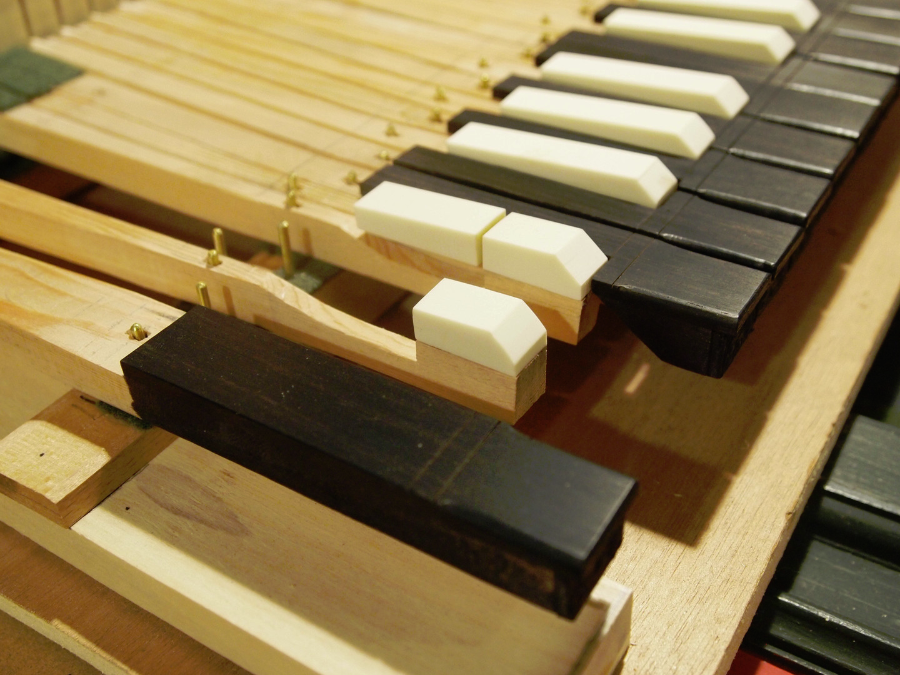
Now for the clever bit. It is obviously vital that the tails of the keys must meet the feet of the jacks, and there is very little margin for error. But all we have to do is to make a dummy jack with a cleft foot, as seen in the picture above. The balance holes (slightly undersize) for the top and bottom keys are then drilled though into the keyframe, and temporary pins inserted, as seen below. The keyframe with the key panel in place is then put into the instrument. The dummy jack is then dropped through each slot in the register in turn, and given a sharp tap with a hammer. This will leave two small indentations, marking where the foot of each jack will be. Lines are then drawn from the part already marked at the balance-rail position, and running between the jack positions.
Note that these lines will be splayed to some extent, especially at the bass, where there are two notes for the apparent C# and D# positions, to take account of the 'broken octave'. This is where the front half of the C# key plays the A below, and the front of the D# key the B (or B-flat if preferred). The back halves play the chromatic note. This also means that the working parts of these four keys are very narrow at the balance points - more about this later.
Also in the above picture, the holes for all the balance-pins have been drilled through the key panel and into the balance-rail. The holes should be under-size, so that the balance-pins can be hammered tightly into the balance-rail. The holes in the keys will be adjusted later.
These two steps mean that after they are separated and placed on their balance-pins, the keys will fit each other, and be in the right position to meet the jacks.
We are now close to separating the key-panel into individual keys. There are several ways of doing the next bit, but my favourite is to prepare pieces of ebony to the exact sizes of the front portions of the natural keys as marked (OK, very slightly narrower) and to trim the fronts and mark the two scribe-lines using a jig, seen below (the extra guide-slot in front of the front edge was for an instrument with longer keys).
The pieces of ebony are then glued to the key-panel, so that the scribe-lines exactly match up.
Then re-mark the sides of the sharps. As the keyboard is black, I prefer white or silver ink for this!
Before going any further, we make the rack which guides the backs of the keys. This is a strip of poplar or lime. The slots which guide the keys are 'relieved' at the back, so that just a narrow edge does the guiding: this is quieter. In the original, the slots were punched out with a chisel, and John Barnes' booklet shows this method. Another way (which I find easier) is to cut of the top ¼" or so off the strip, and then make saw-cuts to correspond with the centre-lines of the key-levers - marked with the rack temporarily in place.
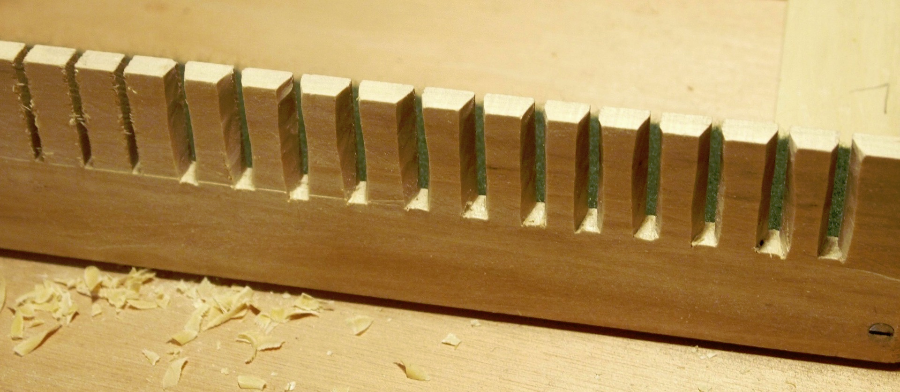
In the picture above, the slots at the left are as sawn; the others have been carved to form the reliefs.
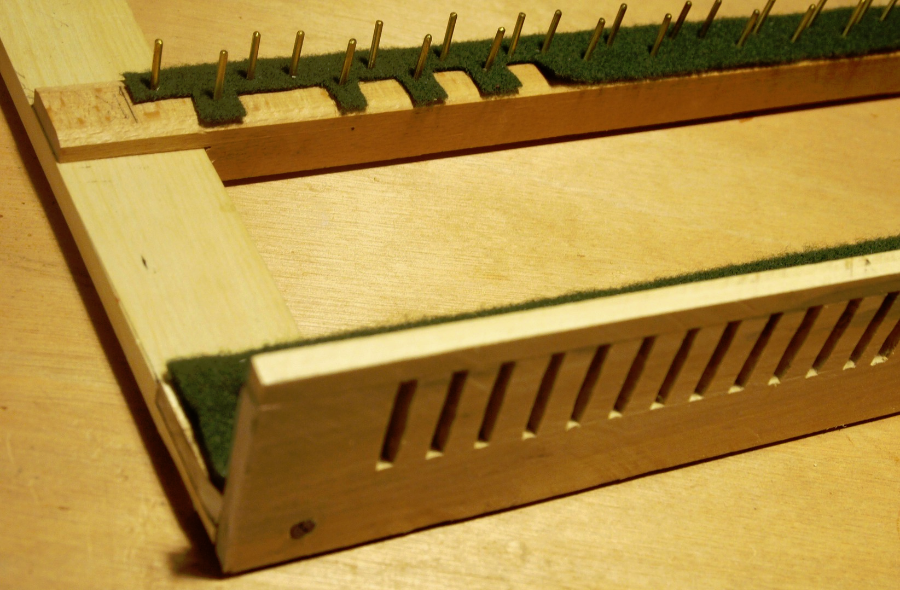
Above we see the rack finished, and the top section glued back in place. For now, the rack is fixed to the keyframe by screws. This is one of a number of insurance policies to allow fine adjustment later if necessary. Whe all is confirmed correct, it will be glued to the keyframe.
Now the key-panel may be separated into groups. The easiest tool for this is a small bandsaw, but we remember that the old masters did this by hand, with a frame-saw. First of all, we cut between the Bs and Cs, and Es and Fs. The gaps that show the most, and on which others will judge your work, are these, all the way to the nameboard, and also the shorter cuts from the fronts of the other keys to the fronts of the sharps. If the cuts are at all 'wavy', then the edges will need to be planed flat, and the gaps will be too wide. One way to keep these cuts straight is to use the fence of the bandsaw, with a spacer if necessary if the keys are cranked. When all the front cuts have been made, turn the panel round and cut from the back to the fronts of the sharps. This just leaves the sharps joined to the naturals at the front of the sharps, and these cuts are best made with a fretsaw or piercing saw.
The holes in the keys and through to the balance-rail were drilled slightly undersize, so that the pins would be secure when knocked into the rail. In the keys, it is necessary to enlarge them to be a smooth (but not sloppy) fit on the pins. Also, there must be an allowance for the keys to rock freely on the pins.
The way I prefer to do this is by way of a tool made specially from a 6" nail, ground to a sort of flat spear-point. This is hammered in; because it has sharp, square corners there is no tendency for it to split the wood. Also, because no wood is actually removed, if the mortise created should be too loose on the pin for any reason, soaking with water will cause it to close up to some extent.
In the picture above, the keys are being fitted from the top downwards. Small blades of pine are fitted to slots at the backs of the keys, and then finished to an easy sliding fit. Without the jacks, the keys should just return to the back-touch. The fronts of the natural keys are under-cut to achieve this - the sharps are no problem.
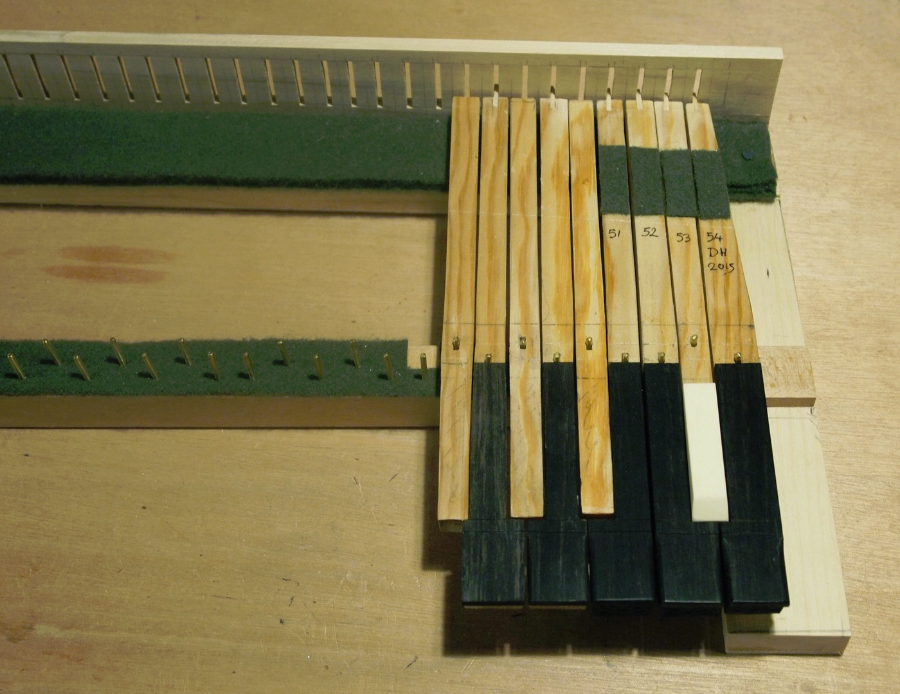
We also see that the blades of the F, G and A sharps are not fitted yet - it is best to fit the naturals first, equalising the gaps, and then to fit the sharps centrally.
The first three key-tops from the right have been finished by rounding-over the edges between the front parts (as far back as the first scribe-line) and fixing the embossed paper decorative fronts. The paper fronts and the sides of the keys as far back as the sharps are stained black.
But ebony is not absolutely black. Usually, it is a very dark grey or brown, with paler greyish streaks. If a uniformly featureless effect is desired, the ebony may be stained with black dye. But I prefer to retain the natural character, and to polish with 0000 grade steel wool, followed by a trace of wax. The G and A keys in the picture have not been polished. If this softer, natural effect is preferred, it is important that all the key-tops should be cut from the same stock, as (like all other timbers) ebony does vary considerably.
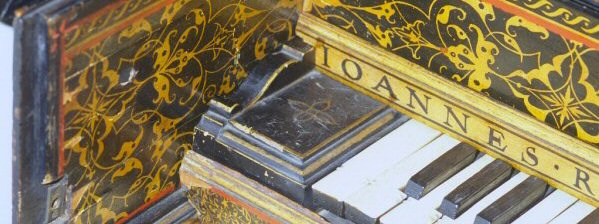
The sharp-tops of the original spinet are solid ivory, but this is not an option now. Even if old ivory could be obtained, the re-working of it would be of doubtful legality. Bone is one option, and there is a supplier in the USA, but it is expensive, and I have not got on well with it. In experiments, I found that the pores attracted dirt which was impossible to remove.
Several artificial substitutes are available, including 'Alternative Ivory' from Masecraft (USA) and 'Elforyn' from Germany. Both are easy to work; when seen together, the Masecraft product has a comparitively pinkish tint, compared to a slight green/yellow bias for Elforyn. Against the 'black' of the ebony, both look good. My choice for this spinet was Elforyn. In the picture, just the D# has the Elforyn top.
THE SHORT OCTAVE AND THE BROKEN OCTAVE
Apologies to those who know this already (you can skip this bit) but the Short Octave was a device, probably introduced in the sixteenth century, to save money. In those days, 'remote' keys were almost never used, and the low C# and D# on a keyboard were therefore not needed, as bass notes were harmonic rather than melodic. On an organ , the pipes neeeded for these notes were large, took up a lot of space, and were expensive to make. So they were missed out, and the keyboard rearranged. the note that looked like F (just below the bass clef) played itself, and below that there was only one key, that looked like an E. But this key actually sounded C. Then the key that looked like F# played D, and G# played E. F was normal, but there was no F#, as its key had been used. Similarly G, but no G#. From A and above, everything was as it is now, or 'chromatic'. Most Ruckers harpsichords were like this, and it was what keyboard players expected.
By the way, this arrangement had the incidental benefit of allowing people with normal hands to play tenths in the bass. For example, playing the apparent E on the keyboard below with its 'octave' would actually sound the tenth C - e. Such intervals are occasionally written in virginal music.
As the compass of keyboards increased, a similar arrangement was used for keyboards reaching down to G, - or GG as we call it, to denote the lower octave. Now, the apparent BB key, the lowest, played the note GG. C played C, but C# played AA. Likewise, D played D, but D# was BB (or BB-flat if preferred).
However, later in the seventeenth century, with more adventurous key-signatures, the need arose for these lowest sharps and flats. But keyboard players were still used to the Short Octave arrangement, so for just a few years - say around 1675 - 1705 or so - we find an arrangement called the 'Broken Octave'. In this, the keys that look like C# and D# (less commonly F# and G#) are divided transversely into two parts, where the front part plays the old short octave note, and the back half the 'new' chromatic note. Our spinet has this system. To a player with a good memory, the 'tenths' are still available.
From the constructional point of view, this does add a bit of interest. The spaces normally occupied by C# and D# now have to provide two notes each. As all the jacks are regularly-spaced, this requires some splaying of the back parts of the keys. At the balance-point, each of the special keys has rather less than half of the width of a normal key, so we have to be careful with the balance-mortises.
But perhaps most interestingly, we have to arrange that each half of the sharp key only sounds its own note, not its neighbour as well. This means that the key-lever for the front part of the sharp, playing the lower note, must be carved away to allow the rear (upper-note) part to be played without interfering with it. I hope that these pictures make it clear!
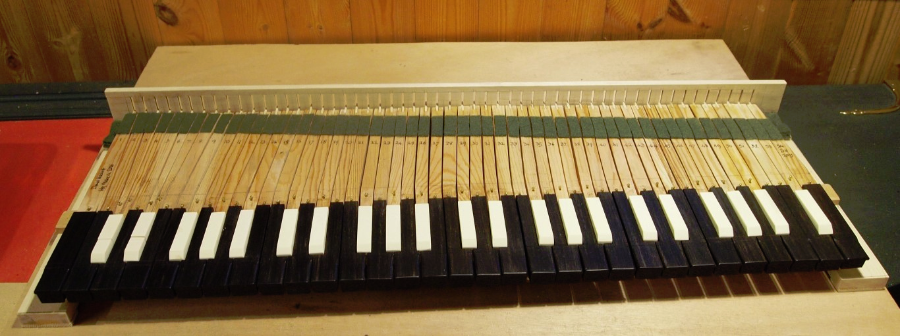
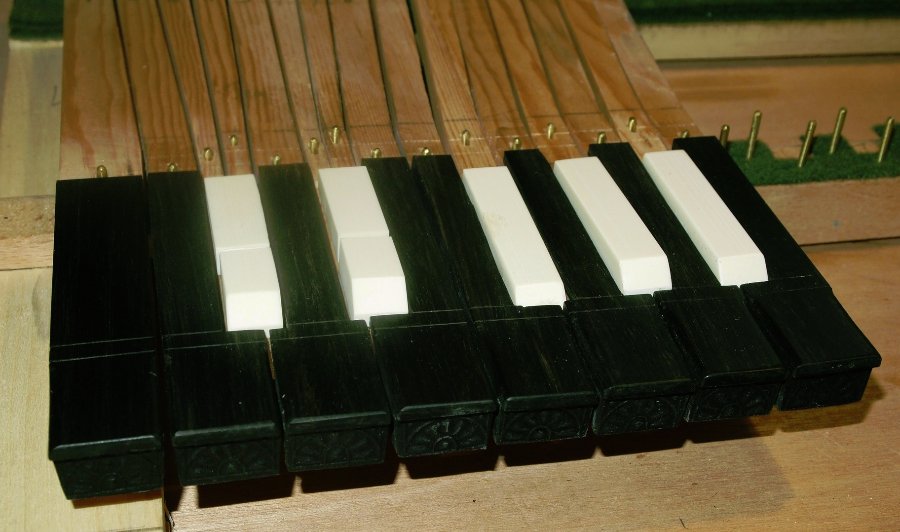
The completed keyboard. The green cloth strips ensure that the feet of the jacks do not clatter. The lowest key has been signed 'David Hackett His Make in 2016' - following the style in which Thomas Hitchcock signed the 1704 original.
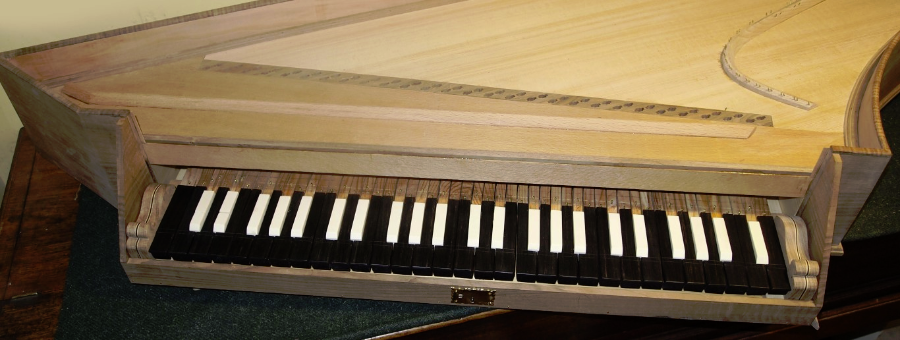
The keyboard in place in the body of the spinet.
This phase of the construction is now complete; the next job will be to finish the case, and then we can start on making the jacks, and doing the stringing.