
The Case (2) - Coming Together
In this section, we will bring the soundboard and bridge together, and complete some of the other case details.
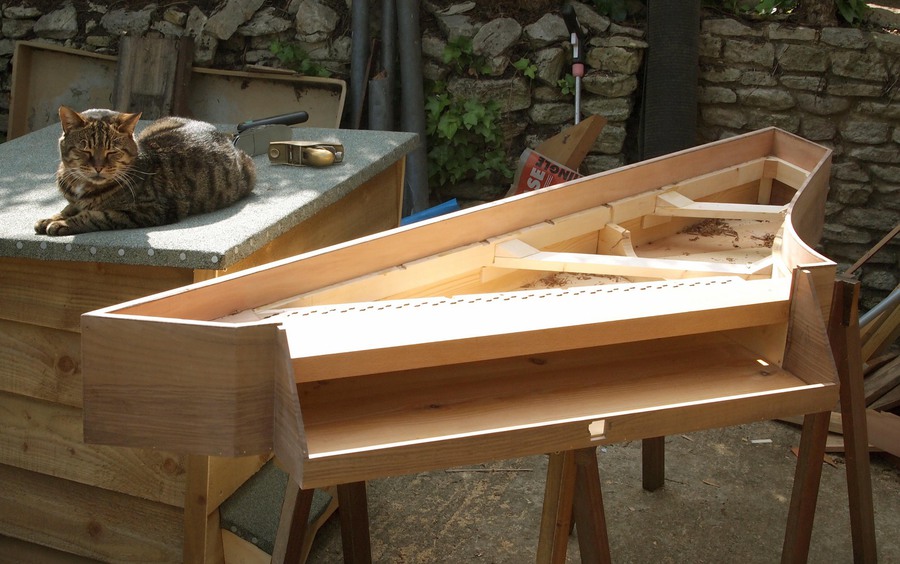
In the original instrument, the soundboard was fitted before the interior veneer, and so the veneer overlapped it; this was a considerable complication when it came to removing the soundboard. We have no intention of taking this one to bits just now, but just in case, and for the benefit of a future generation, the interior veneer was fitted first in the replica. This is seen in the picture above. The original veneer was almost certainly 'Virginia Cedar' (Juniperus virginiana) but this is virtually unobtainable today, certainly in the necessary large clear sections. As a substitute, pear has been used. Although botanically unrelated, after treatment this will have a similar orange/red colour.
Also seen in the picture are the notches in the liner, and the cross-grained capping veneer on the top edges. Leo is keeping an eye on things as usual.
In this picture, the soundboard is being fitted. This feels like (and is) an important milestone. The spinet is starting to come alive.
The edges of the soundboard are first trimmed to be a good fit, especially around the register - this joint will be visible for ever. It's also important to ensure that the notches in the liner match the positions of the soundboard bars.
One important step is to check that no kittens or other items have been left in the cavity, and also to make sure that there is nothing else that needs to be done. It is my habit to leave a note inside for anyone who may come later.
Fitting a new soundboard is actually much easier than refitting a restored one, as everything is (or should be!) clean, flat, and level. But it is still a long joint to glue. There are many tricks, some traditional: using a hot room, heating the wood with a heat-gun, setting a bonfire inside the body, adding urea to the glue... It is very important that the whole of the joint is made and clamped before the glue sets. However, there is no direct stress on this joint, as the hitchpins will be driven through the mouldings and the soundboard and into the liner. So on this one occasion, I prefer to use Titebond Liquid Hide Glue, which gives a much longer working time. It is quite tricky to set up clamps to glue a soundboard, so I used padded nails. These are driven through small squares of shoe-leather before use. It is essential to drill holes through the thin spruce, which would otherwise surely split, but the pine liners below take the nails well, and grip hard.

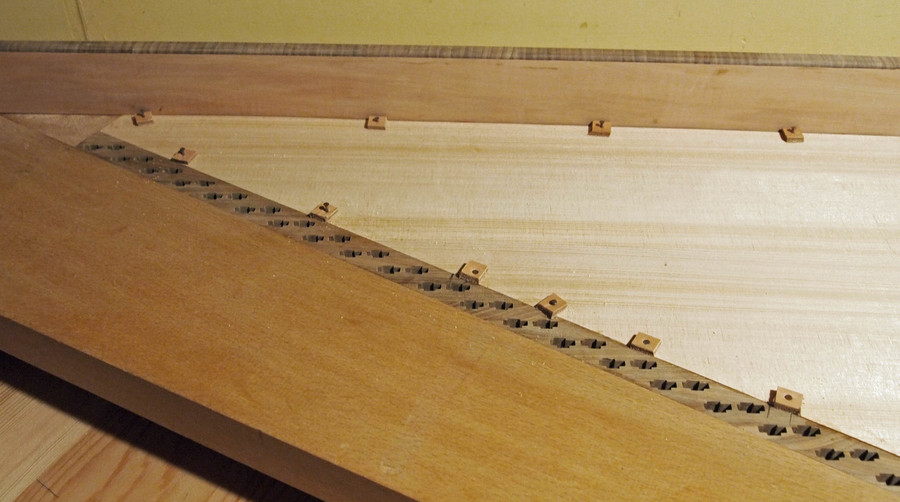
Here is the soundboard fitted, the padded nails removed, and the little holes filled with wooden 'trenails'. This then matches the original, except that there were some iron pins on that one.
Also seen in the above picture are the keyboard blank - more about this later - and the end-blocks on the keyframe.