
The Case - Part 1
The Bentside
The most fun in this section comes from making the bentside.
To those of us approaching this step for the first time, it can seem challenging. And our nervousness is not helped by seeing 'beginners' designs of spinets and harpsichords in the 1970s going to great lengths to avoid curved lines - with ungainly results. However, the graceful shape of the spinet is one of its attractions, so the aim of this section is to reassure the first-time builder that it is really quite easy.
There are about four ways of bending wood:
- sheer brute force
- soaking in water
- heating
- steam (really a combination of the previous two)
We could also mention kerfing and lamination. Kerfing (making saw-cuts about half-way through, and then bending towards the cuts) is often used for hitchrails and liners. But it is really a variation of the first method. I'm not keen on it personally, because it destroys much of the strength, and also can lead to an iregular curve. Lamination has its attractions, especially for larger instruments, and can be used in combination with pre-bending with heat.
But back to our bentside. We should eliminate the first method. It can be used for Italian-style instruments where the case is very thin, but for a spinet like ours, the force needed would be enormous, and it would be impossible for it to stay in shape.
John Barnes' little booklet advocates the soaking method, and that is what I used on my first spinet. But it still needs a lot of force to make the bend, and there is an element of danger. Please don't ask me how I found out, but a piece of wood bent like this acts as a very powerful ballista. Fortunately there was nobody in the firing line.
So I now unhesitatingly recommend the use of heat, in the form of a heat-gun - the sort of thing sold for stripping paint.
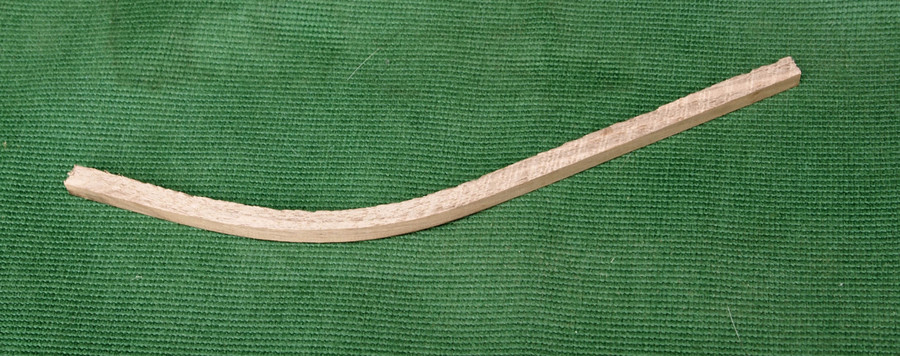
The bentside of our spinet is about ¼" thick. To reassure ourselves that the job is not only possible, but easy, take an offcut from the prepared timber about ¼" square. It is quite flexible. Now hold one end in a vice, and play the heat gun on a section. When it gets nice and hot, it will bend with very little effort, and stay in that shape when the heat is removed. This is a useful rehearsal for how hot to get the job.
The actual bentside is nothing more than about thirty of these pieces side-by-side. It just takes a bit longer to appy sufficient heat.
To make the curve of the bentside, we need a former. This does not need to win prizes for cabinet-work, but it must be strong. This one is made from 1" timber (poplar and maple) that didn't make the grade for instruments. The curve must be a bit sharper than the finished bentside is to be, as there will always be a degree of spring-back. How much sharper? About ½"; i.e the two ends are about ½" in from the intended curve.
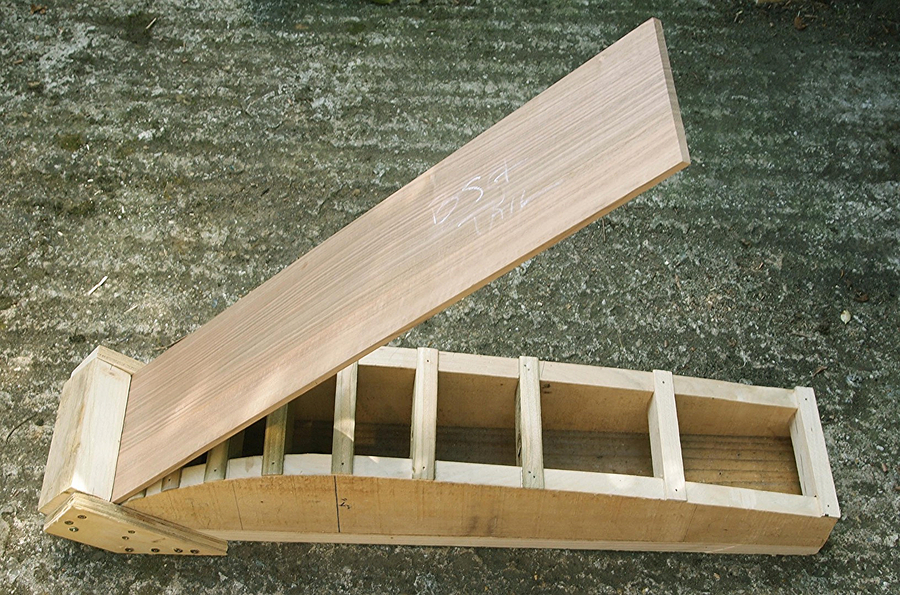
The sharp end is held in place with a block. It is this piece which is in danger of going into orbit if too much force is used, and the structure is not strong enough. Actually, using the hot-bending method, the force required is quite gentle, but please be careful - especially if using the soaking method.
Now apply heat, especially where the curve is sharpest, not forgetting the bit near the block. The wood neads to be hot - much too hot to touch. It does not matter if there is slight charring, as this surface will be the inside of the spinet, but this should (just) be avoided.
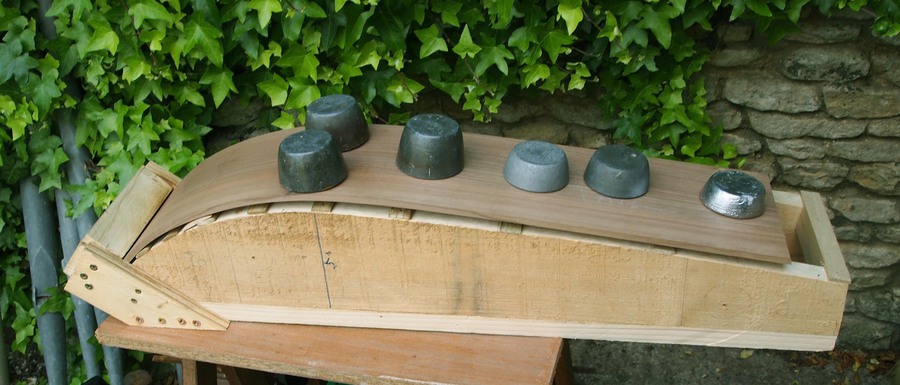
Then, after enough time (ten minutes?) quite gentle pressure will ease the bentside to shape. I actually used heavy lead weights to do the bending. Allow to cool, with the weights still in place. Or clamps could be used.
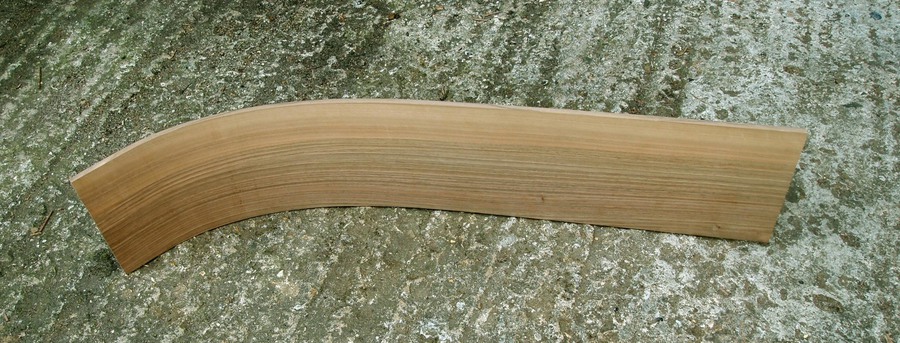
The finished bentside. At this point, as with the jig to make the register, we begin te see the attraction of making more than one spinet. Having made the bentside former, and learned how to do the job, it is quick and easy to make several!
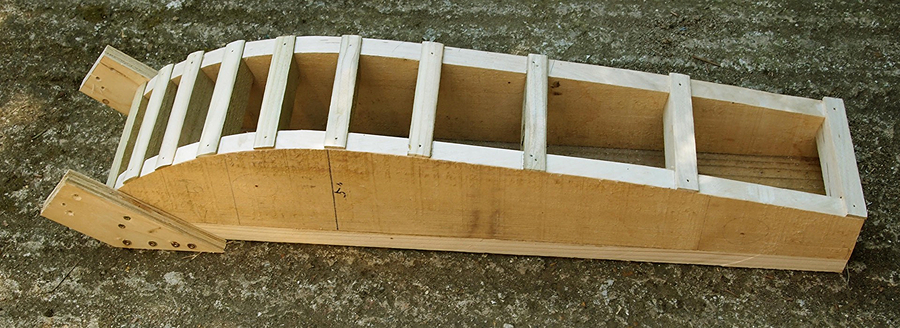
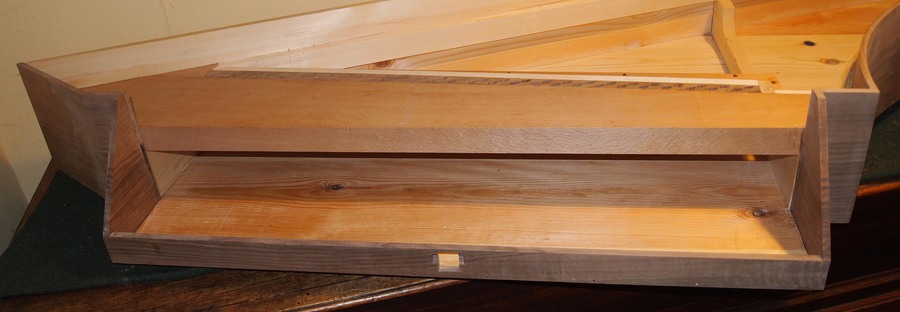
We left the body of the instrument looking like this:
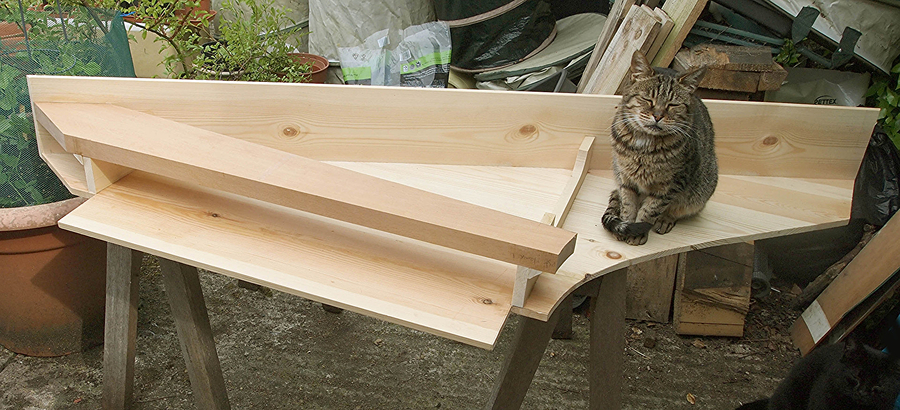
From now on, photography gets a bit more difficult, as the spinet has moved inside, into the somewhat restricted space where it will be completed. An old Kirckman square piano (awaiting restoration) is serving as a workbench.

In the above picture, the walnut sides have been added. This is just like making a box, except that the shape is a bit unusual. The sides are nailed to the baseboard and spine - the mouldings will cover the nail-heads. There are no fancy joints - just plain mitres. The sides are less than ¼" thick, not enough to make secret dovetails. Neat work is essential, though, and good gluing.
The 'liners' are also in place - these are the members that will support the soundboard, and - along the bentside - receive the hitchpins.
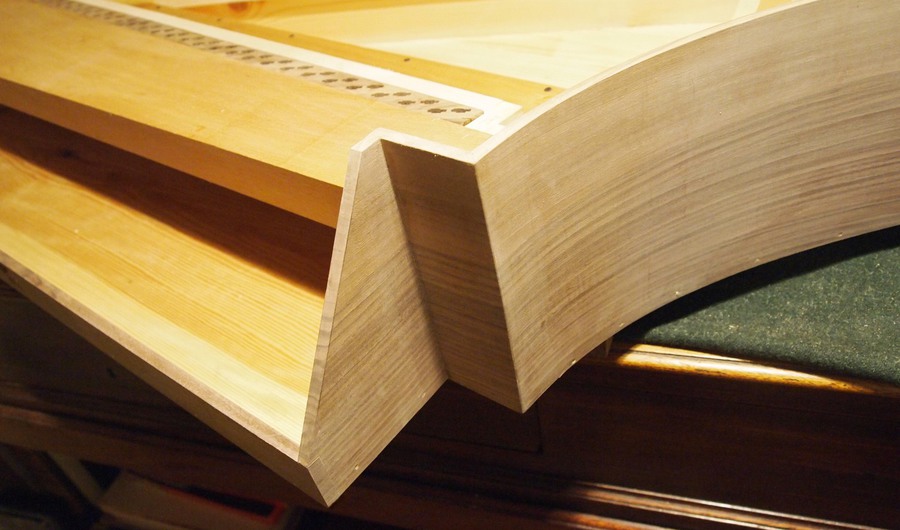
It's nice if the grain 'follows round' - especially if it is stripey, as it is here. The wood is the authentic European walnut, Juglans regia.
In the picture above, we see the transverse member behind the keyboard.
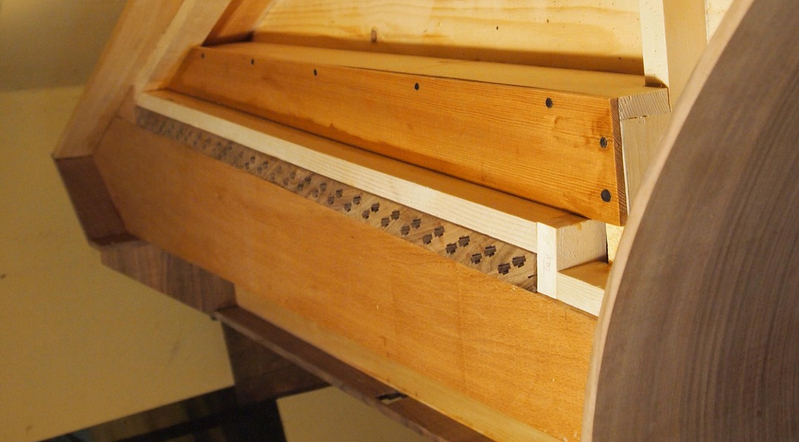
For a reason that nobody (as far as I know) can understand, this space is then enclosed by a sort of 'shelf', seen in the picture above. All suggestions welcome. It is, again as far as I know, a feature of all English spinets. Of course, the makers gave no thought whatsoever for us poor restorers who would revere their work three centuries later. But one inevitable consequence is that this shelf makes visual access to the underside of the soundboard impossible, and removal very much more difficult. But it was there in the original, and it's been reproduced in the replica. To those who may encounter this obstruction in the year 2315, I can only say, "What do I care!"
A small point, but it's much easier to knock out the somewhat fiddly mortise for the lock before fitting the front edge of the keywell. Just a reminder that David Law makes very beautiful, and entirely authentic, brassware for a spinet like this, cast from originals.
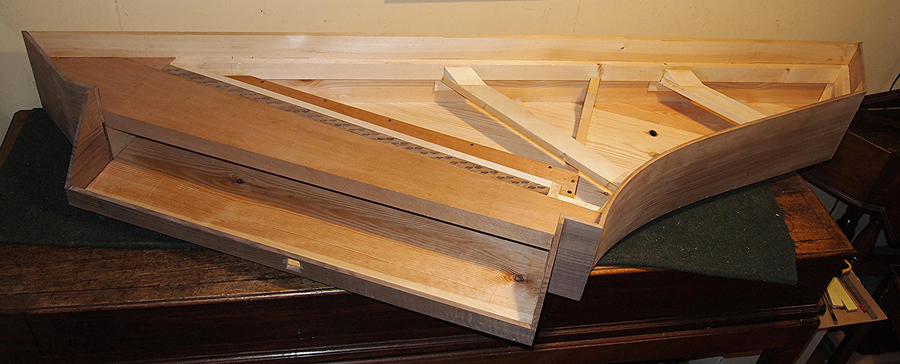
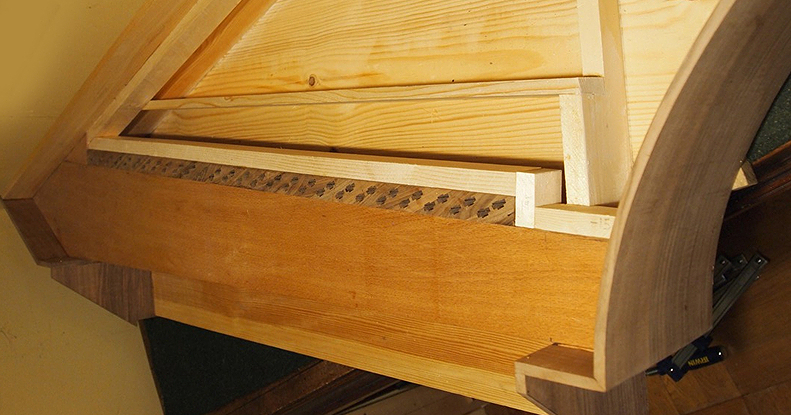
Here we see the two high-level diagaonal braces in place, with their associated supporting blocks. Reinforcing blocks are also inserted to strengthen all interior angles (below soundboard level) - one may just be seen at the back right corner.
This phase of construction may now be considered to be complete. The case has to receive the interior veneer, the mouldings, and the cross-grain cappings to all the top edges. But these finishing details may be left until work on the soundboard and keyboard has been completed.