
Stringing, and Fitting Jacks
This is the part when we really start to have some fun. There's still plenty to do, but one-by-one the notes will sing, and soon we will be able to play chords, and eventually a tune.
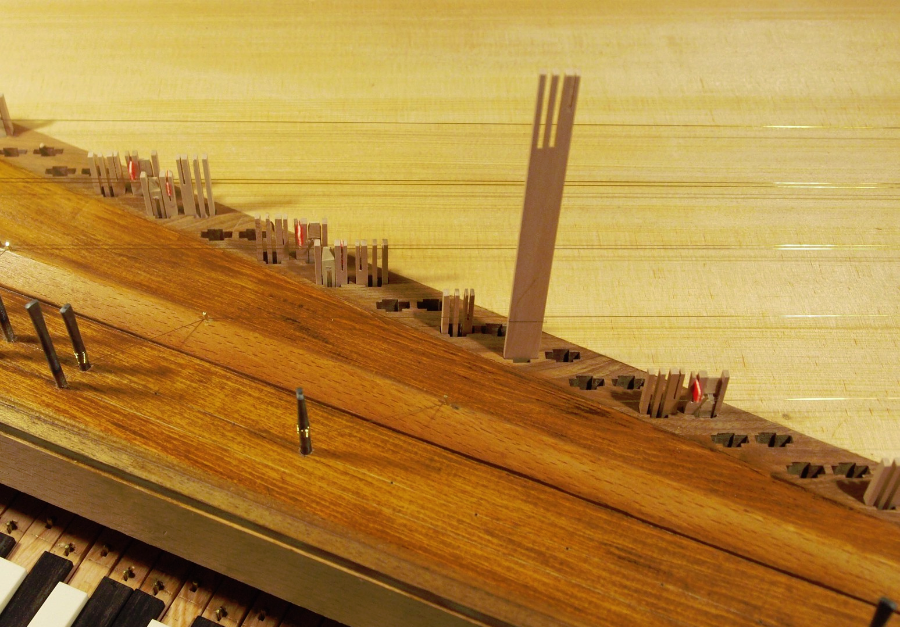
There are many ways of tackling this 'finishing' phase, but whatever we do, we are now past the point when we simply follow the plan (or original) without thinking carefully. The aim of this project is to make a working replica and the project will fail if the replica does not work! So although we continue to learn from the original, the priority now is to fit everything so that it works well and looks neat. So we remember the principle that we fit the parts we can adjust to match what is already fixed. The fixed elements that concern us at this stage are the slots in the register, and the pins on the bridge.
There is a side-draught on the strings, both from the hitchpin to the bridge, and from the nut to the wrestpin. We should take guidance on these angles from the original, but after a point it is more important to ensure a regular appearance. My own way of doing this is to fit the string for middle-C first, then the Cs above and below, and then the F#s (which are the middle members of each octave of thirteen notes). Starting with middle-C, the angle from the hitchrail to the bridge can be marked directly, and the hitchpin inserted. Then put a dummy jack in the correct register-slot, and use a straight-edge to find approximately where the string will cross the nut. Mark this, but do not drill. Make two scribe-lines on the wrestplank for the two rows of wrestpins, and use the side-draught angle for middle-C to place the wrestpin. Mark and drill.
It is important that the wrestpins grip firmly, but not so tightly that tuning is difficult. For the pins we made in the previous section, I find that it works well if I drill a pilot hole 3.5 mm (with a slight angle to the left and towards the player) and then enlarge at full depth to 3.7. Finally, I enlarge about the top half of the hole to 3.8 mm.
We may now make the first string, fit the loop over the hitchpin, take it over the bridge, make the coils on the wrestpin, and drive the pin home. Now push the string, adjusting the tension as necessary, so that it passes the dummy jack at the correct distance (normally about 3.5 - 4 mm). The longer the plectrum can be the better, as it makes regulation much easier, but there must be adequate separation between the two strings of a pair, to allow working space for the vibration, and for the dampers and plectra. Mark the nut at this point, then drill and insert the nut-pin. The string may now be tightened, and brought gently up to near-pitch.
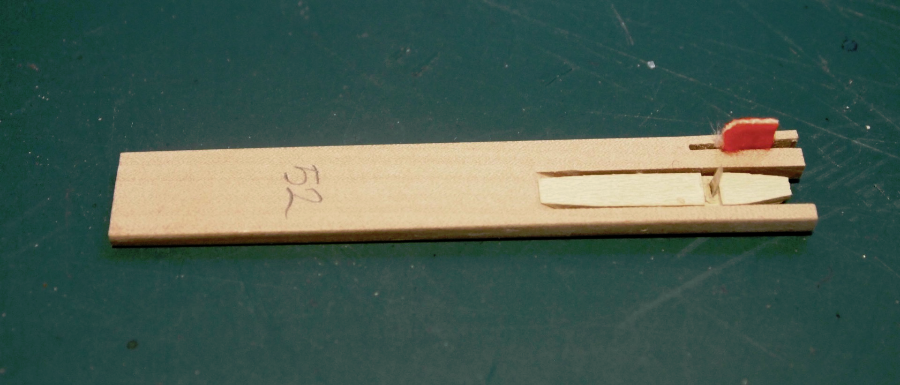
Now it's time to finish the first jack. Using the planing-jig (see previous section) plane a double-ended jack blank to be an easy (but not sloppy) fit in the register. With the jack -blank dropped in head-first, mark the correct length (or just slightly more). Repeat for the other end in the other slot of the pair. Number both jacks, and then trim to length.
Finish the sides of a tongue to be an easy fit in the slot in the jack, and gently chamfer the top and bottom of the sides to give it a sort of punt-shape. This will help to ensure that the corners do not catch and impede the return of the tongue. Position the tongue in the jack so that the tapered lower part fits snugly on the base of the slot; I use a little jig to help hold it in this position. Now drill the hole for the axle-pin, through the narrow side, through the tongue, and just into the wider (damper) side. A miniature pillar-drill (Proxxon again) makes this easier, but a drill-bit mounted in a pin-vice can be used.
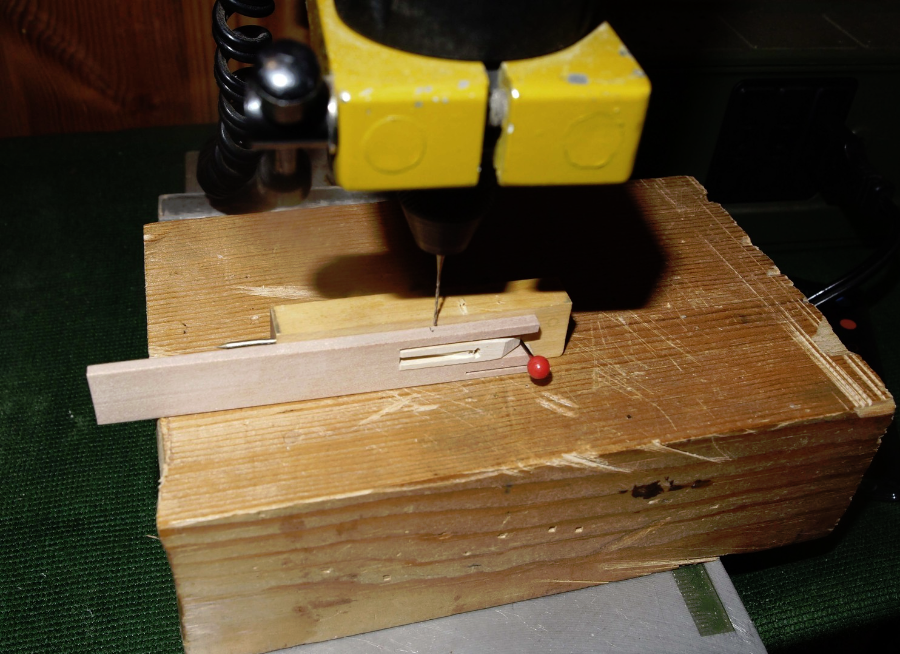
The drill-bit needs to be just a bit larger than the axle-pins. For these, I use gold-plated lacemaker's pins, but fine stainless-steel dressmakers' pins are OK. My pins are 0.55 mm, and the drill 0.6 mm. Put the pin through the holes, and tap gently into the undrilled part of the jack. Now check that the tongue is absolutely free to pivot. It must fall freely under its own weight when the jack is held face-up, and return immediately the jack is turned over. If there is any hesitation at all, identify the cause, and remedy it. Now the pin may be cut off, and the cut end tapped right home and smoothed off.

Note that the top of the tongue must be lower than the top of the jack, to keep it clear of the jackrail.
The return spring for the jack is a pig's bristle; quite a fine one is sufficient if the tongue is really free. My stock was taken from a medium/soft hairbrush, which will provide more than I will ever need.
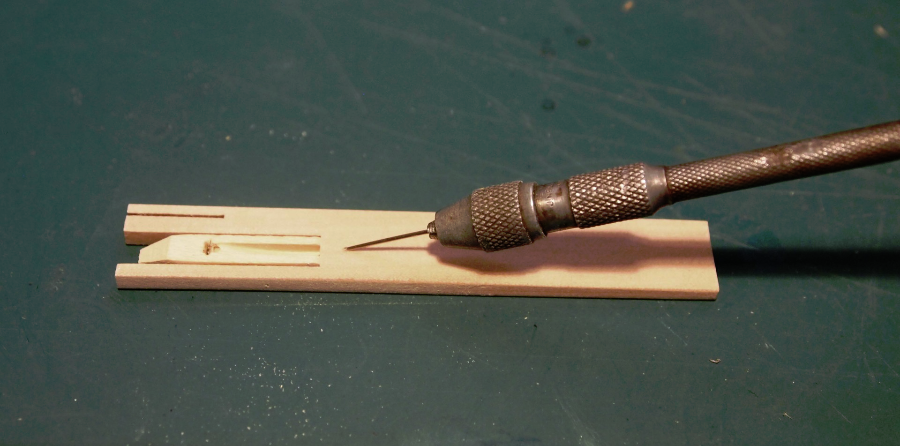
There are more complicated ways of making the hole for the bristle, involving double-bends, but I follow the original method with a simple straight hole. I make this with a fine needle mounted in a pin-vice, and push it in at a slight angle as seen below. Make the hole just large enough for the bristle, and push this in, along the groove, and to the height of the plectrum. Test that it works, and then cut off the excess flush to the jack body with a sharp scalpel. As no wood was removed when the hole was made, the application of a little moisture will cause the wood to tighten around the spring, and it will not come out.
There wil always be discussion over the best material to use for the plectra, and Delrin has its avantages (notably that you can buy it pre-cut). But I prefer to use the real thing - quill. Now we can debate the best kind of quill. Vulture is the traditional favourite, but there aren't many vultures in Chelveston. The point is that the feathers must be of reasonable size, and tough and springy, with no tendency to break. The diet of the bird is undoubtedly important; the more natural the better. I had a friend who kept black turkeys in his orchard; they lived wild, and ate worms and whatever. He remarked that when they roosted in the trees they looked like vultures, so I begged a supply of primary wing-feathers one Christmas, many years ago. I have found these to be entirely satisfactory. Other nominations include raven and crow; rook-feathers are not big enough.
Whatever the choice, we use the thick end of the quill, the hollow part. Split these (a large chisel is an easy way) to give pieces as seen below.
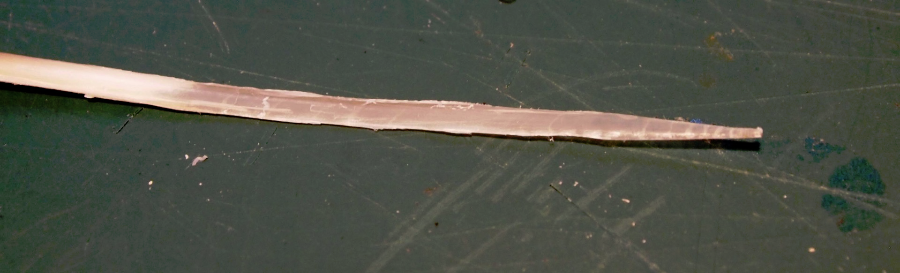
These are then scraped to remove the scaly material from the top face. and the sides smoothed. The quill is then pushed through the tongue from the back, with the curved face upwards. It is trimmed off flush at the back, and projecting about 5 mm at the front. There is no substitute for experience, but it may be said that the the quill must be trimmed to the right length - projecting perhaps ½ mm beyond the string, and tapered in width and thickness. It must be neither too strong nor too weak, and the underside of the tip should be bevelled to aid good return. Also, it must be completely smooth - if there is any trace of notches or roughness, the jack will 'hang up' and not repeat. Note also that a gentle spring, which is all we need if the tongue is completely free, will make it easier for the tongue to move away from the string, and hence allow the jack to be light.
It's best to make and fit the jackrail early on in this process. Later spinets (e.g. those made by the Hitchcocks) often had a padded rail at the back of the keyframe to limit key-dip, and later still (in English pianos) the front rail was padded to achieve the same result. But in the early spinets of the school of Stephen Keene, the touch was limited only when the jacks came into contact with the jackrail. Without this in place, it is very difficult to ensure that the action works properly.
At the right-hand end, the jackrail slides into a decoratively-shaped housing.
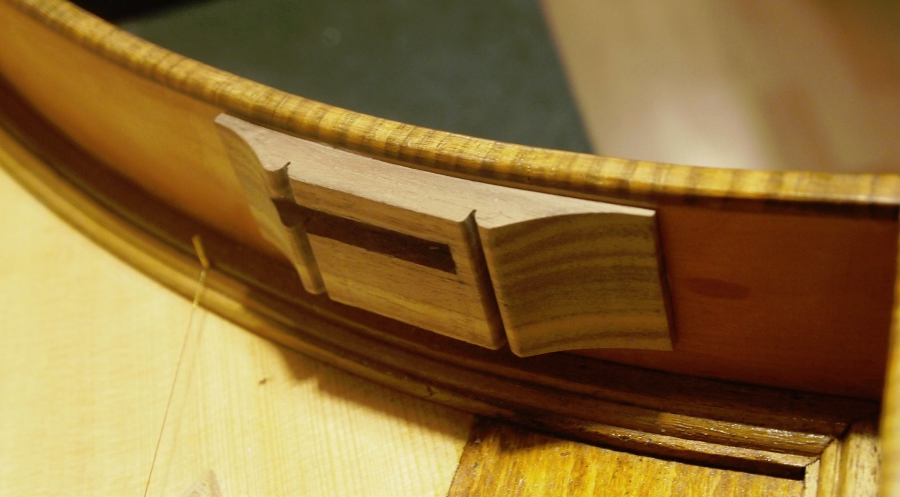
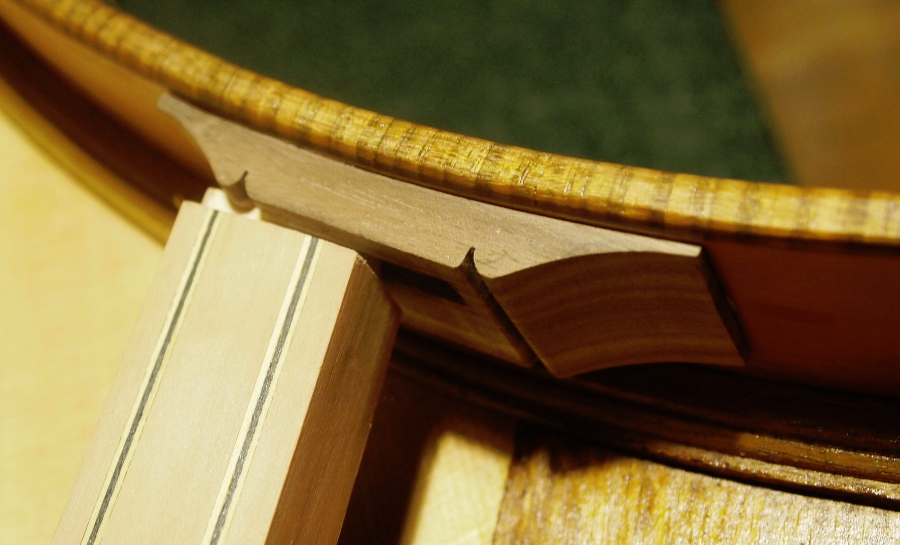
The left end is fixed by a short tenon into a mortise in a continuation of the jackrail, which is glued to the spine.
In the pictures above, the jackrail and bracket have not yet been treated with shellac . The jackrail of the orginal is made of pine, veneered to match the rest of the interior surfaces, and inlaid with two light/dark/light lines. As we are using pear for this spinet, with the benefit of hindsight it would have been easier to make it from solid pear.
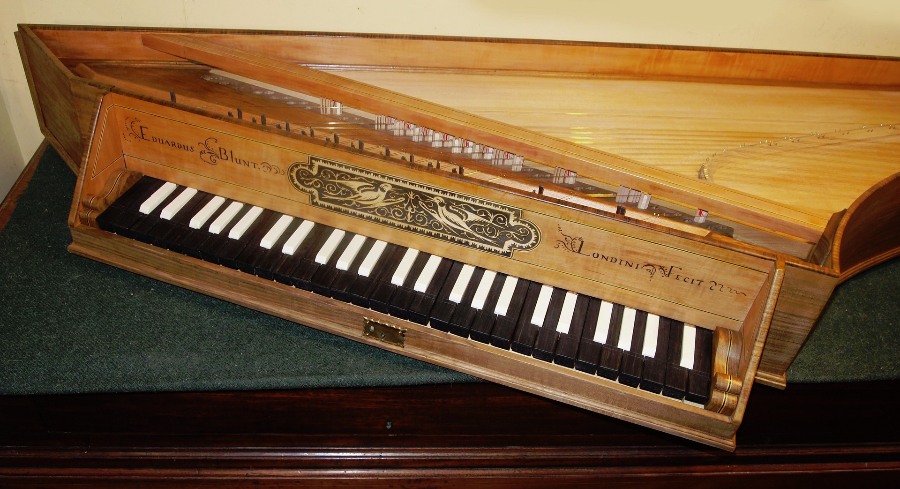
From now on it's just a question of completing the work, adjusting and regulating as we go. As we go, it's good to enjoy the sound of notes and the first harmonies and tunes. The real sound of an instrument is never realised until all the strings are there, and have settled down - this takes a few weeks. However, we can already be cautiously optimistic - the sound is something like the original.
There are perhaps a couple of detail points worth mentioning:
1) On this spinet, the bridge-pins are fairly well down the slope on the 'live' side, which ensures that the first point of contact with the string is the pin itself. On the nut, however, the pins are near the crest. If we are not careful, the string may make contact with the wood before the pin. This has the effect of making a 'pizzicato' sound, rather than the clear singing tone we seek. Make sure that the pins are right on the edge, and that the first contact of the strings is with them, as on the bridge.
2) The other point concerns the tapering of the jacks. The original jacks do have a noticeable taper in width and thickness. If we make the jacks with these dimensions absolutely constant, then we may find that the touch becomes very heavy at the bottom of the stroke, and this can spoil the touch. Tapering the jacks (especially the lower part) cures the problem. The box-guide is the best part of an inch deep, and it is my feeling that because both the keys and jacks are rather short in a spinet, and the motion is an arc of a circle rather than a straight line, then the taper allows the angle to change slightly without jamming. Whether this logic is correct or not, I'm not quite sure, but it cures the problem!
Return to the Spinet Page