
Jacks and Wrestpins
There are many ways of making jacks, and of course they were originally made using hand-tools only. John Barnes' booklet, which we mentioned at the beginning of this story, gives us a good idea of the method, and it can still be used today. However, jacks do need to be made consistently and accurately, and it is tempting to take advantage of modern machinery. This is particularly true if we have some of the machinery already, and if we are contemplating making more than one instrument. Once we are set up with various jigs and techniques, it is no problem to turn out a few hundred.
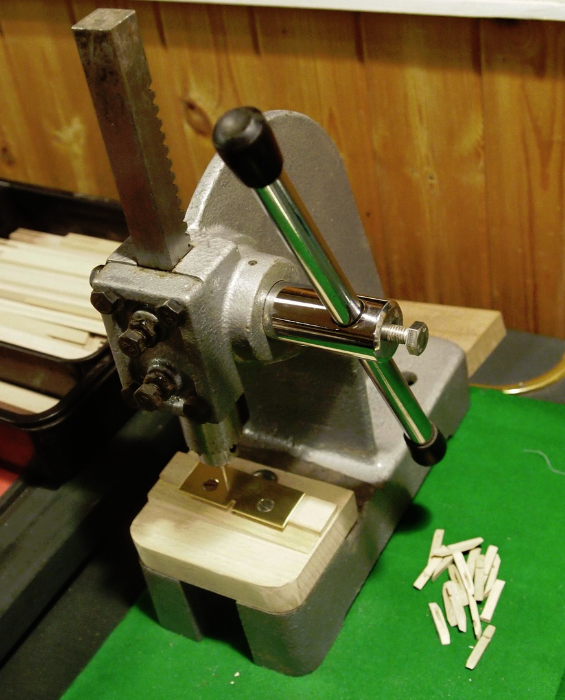
However, if we start from rough-sawn timber (which is how most hardwoods are sold) it occurs to me that I use a fair number of machines. Approximately in order, these are: large circular saw, planer/thicknesser, bandsaw, small circular saw, and miniature drill. All of these have many applications, of course, but perhaps the least common is the small circular saw, seen below.

This is a Proxxon machine, with a blade that is adjustable for height and tilt. For this special purpose, when delicate sections of wood must be supported close to the cut, I made a replacement zero-clearance plate for the blade, This is made by cutting a piece of 3 mm aluminium to the size and shape of the original plate, but with no slot for the blade. The plate is fitted with the blade retracted, the machine switched on, and then the blade slowly raised. The TCT teeth will cut their own slot with no difficultly, and after a little while the blade will run quietly. Please note that it is very dangerous to attempt to use the saw for this job without such a close-fitting plate. With a wider slot (which is supplied as standard to allow the blade to be tilted) the thin sections will be unsupported, and will be snatched into the slot. This machine may be small, but it would have a very nasty bite!
Now to start making the jacks! There is a choice of timber; as we noted, the originals were made of beech, but I do not get on well with this - the grain tends to have a way of its own. Many classical harpsichords have jacks made from pear, or sometimes service-wood. These are my choice, as they have a very unobtrusive grain pattern, which makes accurate work easier. This is particularly true of service-wood (Sorbus torminalis), which is unfortunately very difficult to obtain these days, but I am fortunate to have some old stock.
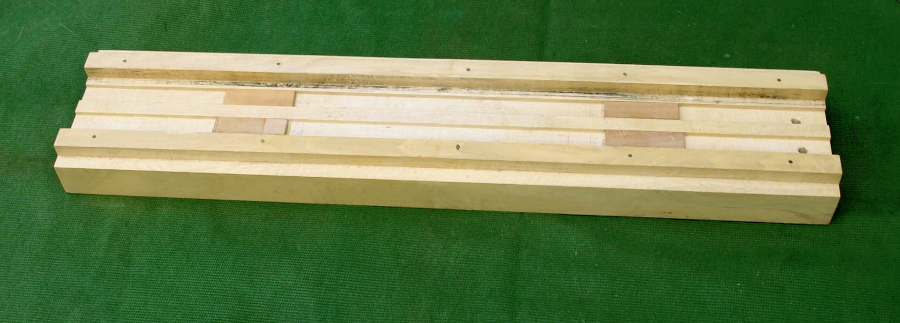
We start, of course, by preparing strips to the correct width and thickness, normally by making blanks with a thickness equal to the width (about ½") and then cutting strips off this. For the initial finishing (and later for the final fitting) it is worth making a jig with two slots, and hardwood strips at the edges for a block-plane to run at the correct depth. Spinet jacks are quite short, and it is easier and safer to make them in pairs, foot-to-foot. The jig is then also suitable for making harpsichord jacks.
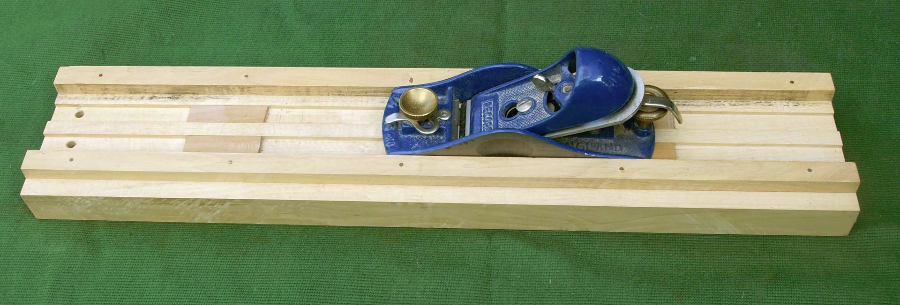
The block-plane used with this jig needs to be maintained with a very sharp edge.
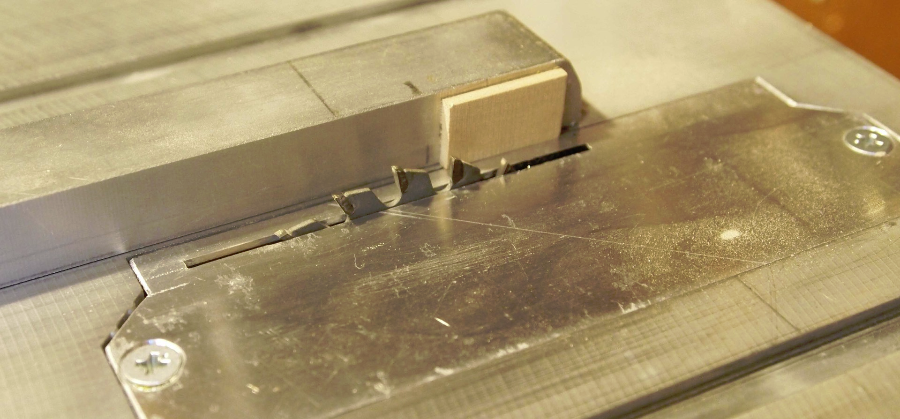
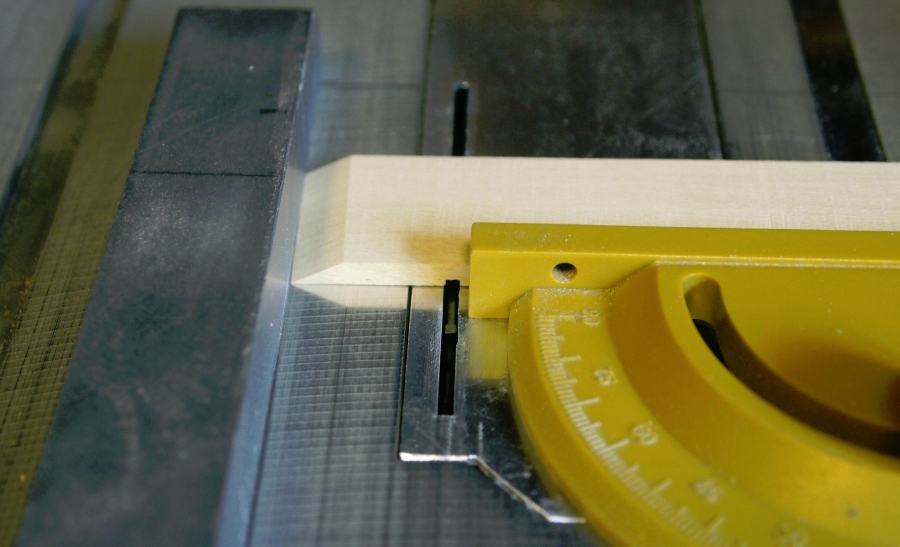
The slot for the tongue needs to have a sloping end, to control the motion. This may be efficiently and accurately achieved by taking advantage of the way in which a circular-saw blade cuts. It just needs to be set at the correct depth to achieve the angle. The picture below shows a wooden stop fitted to the fence to ensure that all the slots are exactly the same length. The zero-clearance plate insert is also shown.
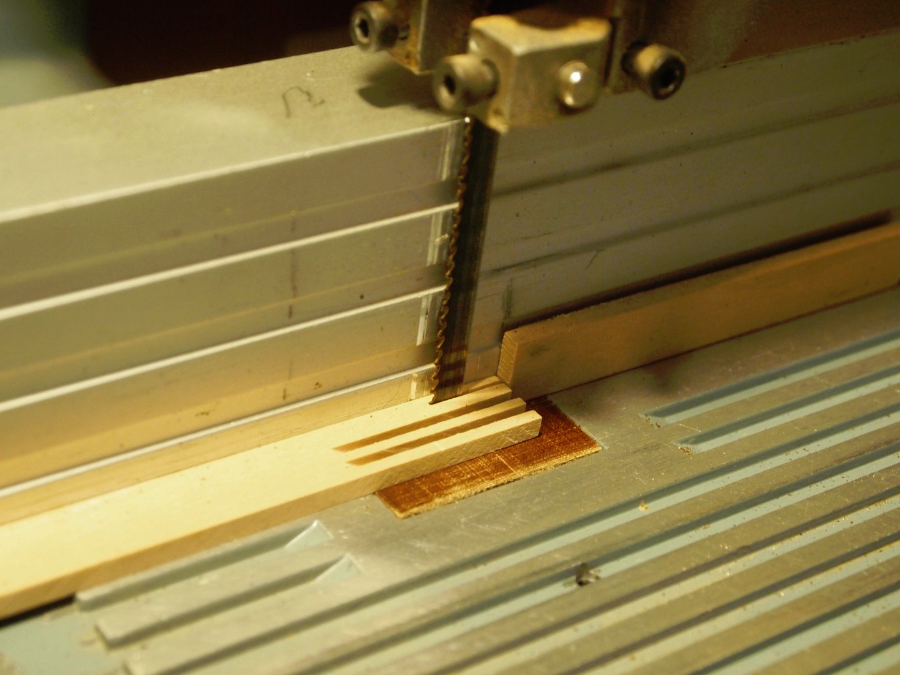
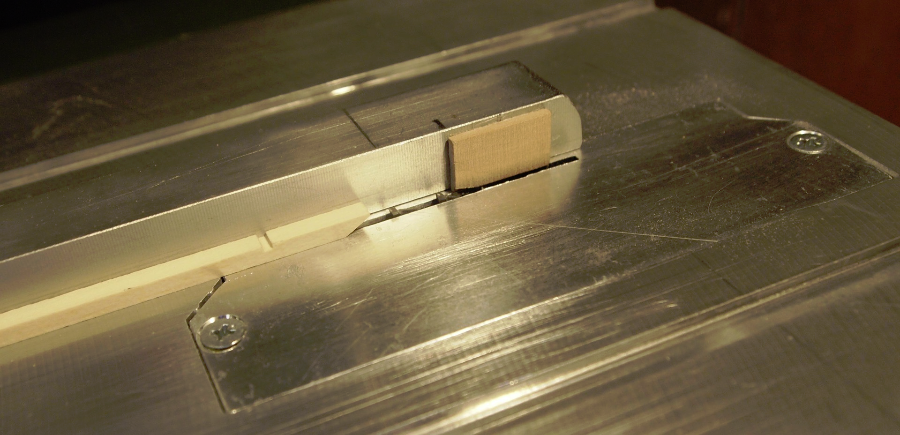
In the picture below, the second of a pair of parallel cuts has been made.

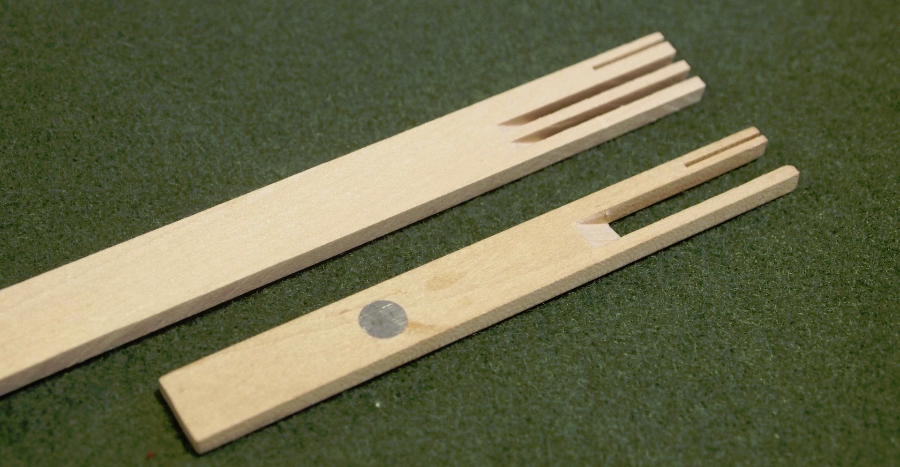
The small slot for the damper is made on the bandsaw, with a similar limiting stop.
The front and back faces are seen below.

The waste piece between the two saw-cuts is removed with a small chisel.
The partly-finished jack below has a small lead weight. These should not be necessary if everything works freely, but repetition may be improved. We will build this spinet without weights in the jacks, but possibly add them later.
The Tongues
There seems to be almost universal agreement that the best wood for the tiny tongues is holly, which is hard, very resistant to splitting, and strong enough to withstand punching the slot for the plectrum. The first step is to prepare a piece of wood to the correct thickness, slightly less than the finished thickness of the jacks. It is much easier, and much safer, to prepare the pieces of wood much too long (at least 4") and then to shape a tongue at each end. This will result in the 'waste' of a certain amount of wood, but a small piece of holly is enough to make hundreds of tongues, and holly-wood is much cheaper than fingers anyway!
In the picture below, a chamfer has been applied to the end of the strip (but this can be done later). The Proxxon saw is being used to cut a groove to mark the positions of the plectra. This groove also makes it easier to punch the slot for the plectrum, and allows an extra millimetre for it to flex during the plucking action. Not much, but every little helps!
The picture below shows a strip of the final width, separated from the above piece, being slotted with a groove to receive the bristle spring which will return the tongue to its 'ready' position for a new stroke. For this operation, the blade is set to make a cut about 2 mm deep, stopping at the position of the plectrum.
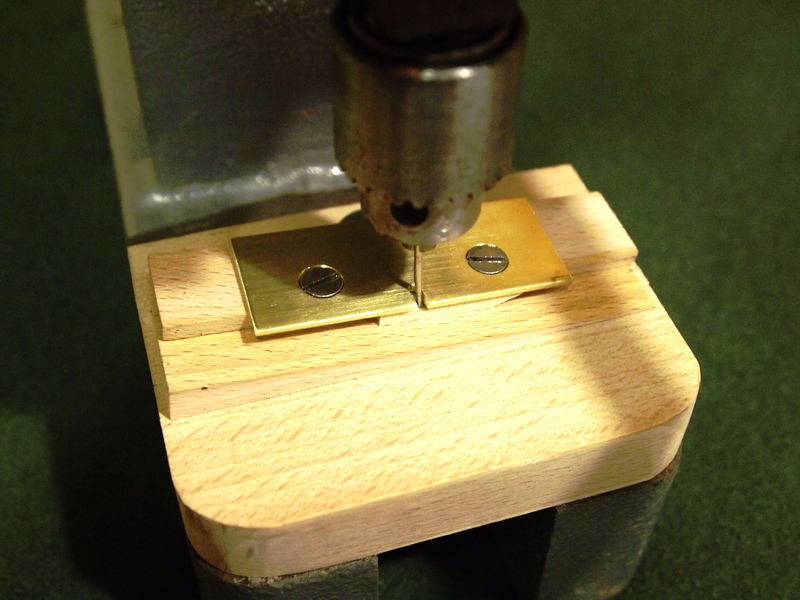
The tongues may then be trimmed to the correct length. The next job is to punch the little slot for the quill. To ensure a reliable return of the jacks, it is absolutely vital that the quill should not point downwards. Horizontal is just about OK, but it is safer to have them pointing upwards at about a 5° angle. A punch to make the slots may be made from hard 'piano wire', about 1.2 mm. I find it better to hammer the end flat to a chisel point, and then finish with a diamond file. Grinding on a wheel risks heating, and spoiling the hardness. To get the size and shape right, a certain amount of experimentation may be necessary.
To make the slot, the simplest way is to mount the punch in a small piece of wood, get the position and angle right, and give it a tap with a small hammer.
This is the method I used for my earlier instruments, but I have recently made a fancy machine, using a small Jacobs' chuck mounted in an arbor press. This is fun to use, and ensures that the angle is constant - it is set by the sloping bed. The brass plate, firmly mounted about 4 mm above the bed, holds the tongue down when the punch is withdrawn - this requires nearly as much effort as punching the slot.
This is fine if you enjoy making machines, or intend to make a lot of jacks, but it is probably not worth it for one set.
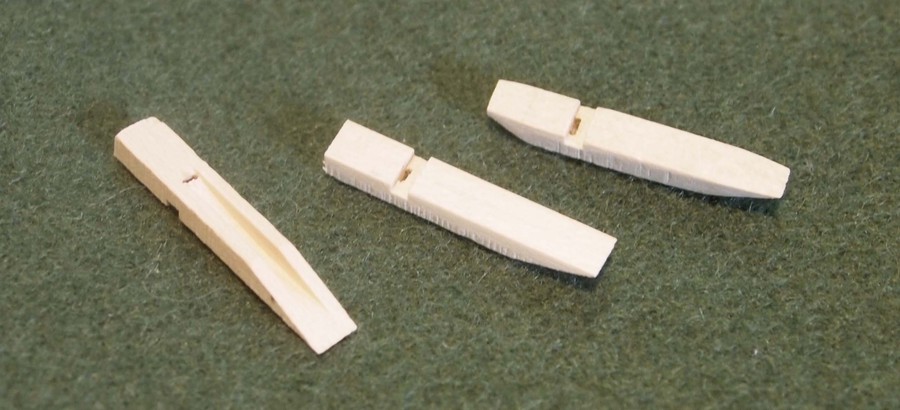
In the picture above we see the tiny punch in action, and below some punched tongues. The one on the right has been finished with a chamfer to the back of the top, and also slightly in width at the top and bottom to ensure easy pivoting.
The fitting of the tongues to the jacks, and the finishing and fitting of the jacks, will be covered in the next section.
Wrestpins
It is possible to buy wrestpins, but none as far as I know with a convincing 'authentic' appearance, and they are fun to make anyway.
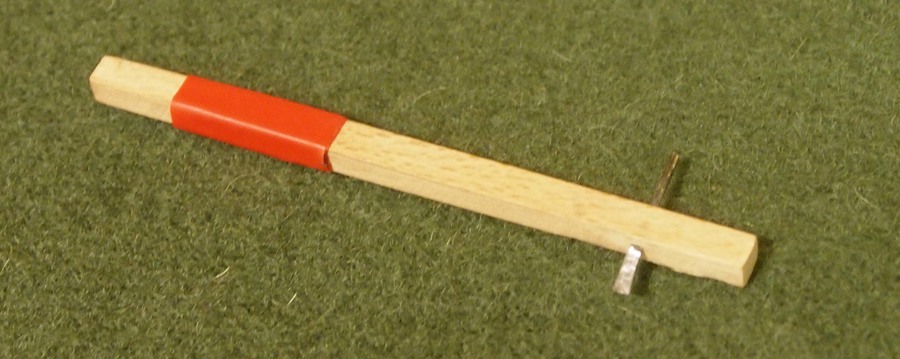
Ordinary wire nails are made from the perfect grade of soft iron, and 4" nails (at about 4.5 mm diameter) are suitable for larger harpsichords and early pianos. 3" nails, at about 3.7 mm, are ideal for the 4' registers of harpsichords, and for clavichords, and spinets.
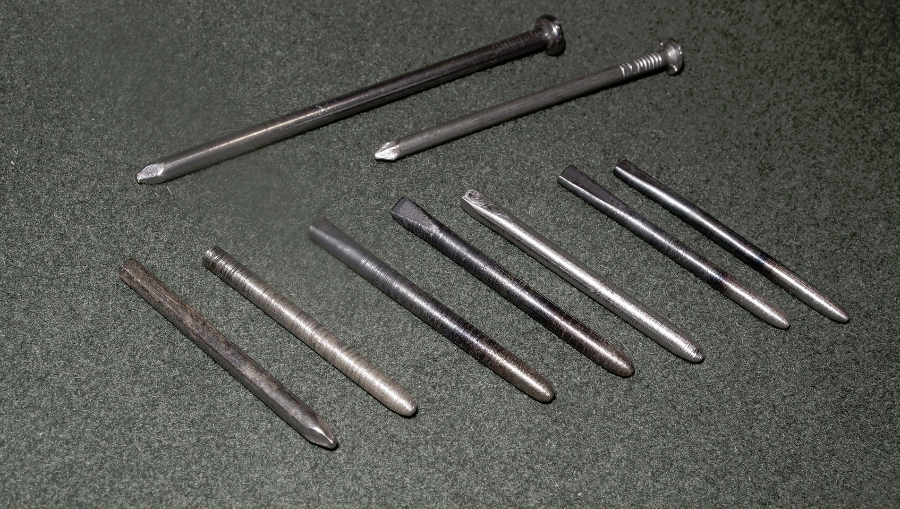
The two sizes of nail are shown at the top. In the bottom row, the first four are the larger size.
Firstly, the nail is cut to length, using bolt-cutters or a hacksaw.
Second, the top is filed flat, and the nail mounted in a chuck on a lathe to form the blunt point and taper with a file. The upper part is also slightly roughened to help the string to grip.
3 & 4 - the upper part has been heated bright red with a blowtorch, and hammered to the desired shape on an anvil. (This can be done cold, but it is easier, quieter, and more fun to get it red hot. This also gives an attractive blue-black finish.
Number 5 - this one has been filed to a taper on the sides (like most square pianos) and also finished 'bright' (like some Broadwoods).
6 & 7 - pins for this spinet, from 3" nails.
Return to the Spinet Page